27
Oct
08

Simple preloader for AS3 using loaderInfo class

Like many of you, I am quite comfortable with creating preloaders in Actionscript 2. Unfortunately, several of these procedures have had to evolve as part of the transition from Actionscript 2 to Actionscript 3.

In AS2 you might have done something like this:

// frame 1 of main.swf
stop();

this.onEnterFrame = function() {
var loaded:Number = this.getBytesLoaded();
var total:Number = this.getBytesTotal();

var percent:Number = loaded/total*100;


if (percent > 99) {
trace("Load complete");
play();
delete this.onEnterFrame;
}
}

In Actionscript 3, the process is a bit different. The methods getBytesLoaded() and getBytesTotal() are no longer a supported methods for getting byte information on a loaded .swf. In AS3 they introduced a new class loaderInfo for performing such tasks.

Continue reading ‘Simple preloader for AS3 using loaderInfo class’

18
Sep
08

Web Services in AS3, or “dude, where’s my component?”


One of the first things I (and many others!) noticed about AS3 was that the WebService component we relied on in AS2 was missing.

Yikes. We use web services all the time.

Fortunately, there is a workaround.

Continue reading ‘Web Services in AS3, or “dude, where’s my component?”’

16
Sep
08

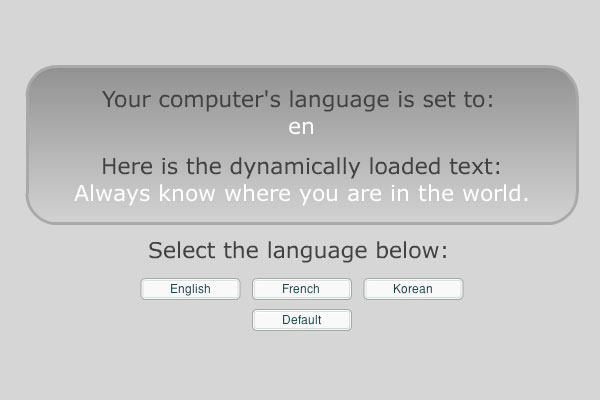
Creating Multilingual Flash Sites

Building a dynamic multilingual site is made easy using flash’s flash.system.Capabilities class. This class does many things, like check for flash plug-in versions, screen resolutions, operation systems, language, and IME accessibility.

This tutorial illustrates strategies to adapt flash content determined by the user’s language preferences.

Continue reading ‘Creating Multilingual Flash Sites’

10
Sep
08

Building Custom Flash Panels

This example shows you how to create your own custom window panel for Flash CS3. The functionality for this project will be to change the current document setting to the supplied attributes below. For example, this could be used to modify things such as document height, width, frame rate, new layers and add Library folder items.

1) First create a new flash document and change he background color to match the other panels use the value #EDEDED.

2) Drag and drop a Button component to the stage and give it the label name “Default Flash Setup”. Also set the Button’s instance name to “setup” in the properties panel.

3) Save the flash file as “Default Flash Setup.fla”. We want to make sure that the flash file name is logical to the panels functionality. Why? Because the panel’s name is derived from the flash file name.

4) Create an actionscript layer and copy and paste the code below into your actionscript panel.

////////////// START AS CODE ///////////////
setup.addEventListener(MouseEvent.CLICK, setup_CLICK);
function setup_CLICK(e:MouseEvent):void
{
     var jsfl:String = "fl.getDocumentDOM().getTimeline().setLayerProperty('name', 'as');fl.getDocumentDOM().getTimeline().setLayerProperty('locked', true);fl.getDocumentDOM().library.newFolder('Sounds');";
     MMExecute(jsfl);
}
////////////// END AS CODE ///////////////

The code above does two things:

  1. Adds an event handler to the button instance.
  2. Calls the MMExecute function to pass in jsfl code (Javascript API) for controlling the flash authoring tool.

5) Adding jsfl Codes are easy. You can find the jsfl code in side of the Help panel > Extending > Objects. For example to find ways to change the document, go to Help > Extending > Objects > Document object and select an object to view it’s sample code to copy and paste in to your actionscript. Also make sure there are no line-breaks. See sample code above.

To create jsfl code on the fly, use the History panel like you would the Photoshops’ Actions panel to create droplets or custom actions. Give it a try. Open the History panel and open a new document. Create a new layer and name it “as”. Create a new folder in the Library panel. Go back to the History panel, select all history listings and right click or control click to copy and past the code in to your project actionscript.

6) Publish the file and move the swf file to the “WindowSWF” directory located inside of your user’s folder. I’m not sure where this is located on the PC; however for Mac OS X, it’s located under User > Library > Application Support > Adobe > Flash CS > en > Configuration > WindowSwf.

Now restart your flash application, open a new document and you will find your new custom panel under Windows > Other Panels > Default Flash Setup.

Click the button and watch your document change before your very eyes.

That’s it.

Get the source here.

P.S.

For another cool example of creating your own custom panel, The flash blog has an Event Generator panel that will save you a lot of time in writing event handler code for movieclips that are placed on the stage.

Download the extension here: http://theflashblog.com/?p=331

05
Sep
08

SoundMixer – Sound Visualization in Actionscript 3.0

Fans of many different types of music are now beginning to develop a new appreciation for the visual component of the live concert.  Sophisticated light shows, digital displays, and entertaining special effects such as pyrotechnics and smoke all combine to enhance the entertainment experience by taking it to a whole new level of sensory stimulation.

Much of today’s music is delivered to the listener using some type of digital device. For those of you who listen to your library of songs on a computer, it is likely that your software application supports sound visualization. Both iTunes and WinAmp, which are among the most popular applications available, have supported sound visualization for quite some time.

As Flash designers and developers, we’ve struggled for many years to find an easy way to extract the appropriate data from an audio stream and create a visually compelling experience for our viewers. Several classes, recently introduced in Actionscript 3.0, have simplified the process for us.

The SoundMixer class contains static properties and methods for global sound control in the SWF file. To create sound visualization, the method we should focus on is called  computeSpectrum. This method takes a snapshot of the current sound wave and places it into a ByteArray object. The values are formatted as normalized floating-point values, in the range -1.0 to 1.0. This provides us with numerical values which we can use to manipulate the position, scale, color, or even the intensity of a filter… the possibilities are endless.

The method described above takes the data in the ByteArray and uses it to draw a series of line segments. The data is updated continuously using the EnterFrame event handler, and since the spectrum is overwritten each time, we can use it update the visual.

Hopefully the demo attached below will jump start your process for making your own sound visualizations. Feel free to post your examples below!

See the demo here.
Get the source here.

05
Sep
08

Using Flash’s Drawing API and bitmap blitting.

This is a fairly simple, yet still compelling way of using some of Flash’s built in features to create some cool effects. Despite continual increases in processor speed and graphic card performance, there is still a need to optimize animations within your Flash files, particularly when creating animations programatically.

The following example utilizes the Drawing API to create short line segments. I’ve used Zeh Fernando’s group of Actionscript methods found in MC_Tween to handle the “pen” movement around the screen. Each segment is drawn into a hidden movieClip.

A Bit About “Blitting”

For those of you not familiar with the process of “blitting”, it is actually a programming approach that has been around for some time. Originally called a “BitBlit”, it was a series of routines used by early developers of computer graphics to control drawing operations. The primary function of BitBlit was to copy bitmap graphics from one location to another. These routines were later streamlined in modern languages, and evolved into a function simplified as blit().

At the time of this writing, Actionscript does not have a built-in function called “blit”, but the process can be simulated by utilizing Flash’s built in bitmapData methods. In Actionscript we use the method draw().

This approach is used to lessen the strain on the Flash Player. Normally the player would have to render multiple objects on a screen, sending them to Flash Player’s display processor, each time the Stage is updated. In a situation where you might have 1000 sprites moving around the screen, the end result would be a creeping movement that severely impacts the user experience, especially in game applications.

By “blitting” or drawing the sprites located in a hidden movieClip, into a single bitmap, the result is that Flash only has to render that single bitmapData object. There is no need to spend precious processing cycles on anti-aliasing of multiple vector objects. And the performance benefits are quite impressive.

See the demo here.
Get the source here.


April 2024
S M T W T F S
 123456
78910111213
14151617181920
21222324252627
282930